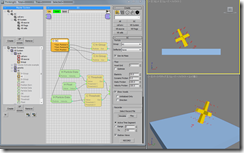
パーティクルをグループ分けするtPで要の機能。SCの動きにも関係するShape Collision Dynamicsのパラメーターもここにある。

Color – ビューポートでのカラー
Display Dropdown – ビューポードでどんなタイプで表示するか。

Besides the standard particle viewport display styles, thinkingParticles offers a display option that shows the Particle ID for each particle. This ID can be used in conjunction with the PSelection Operator to delete specific particles for example.
A Particle ID is only valid as long as the particle exists. When it dies, this number can be recycled for other particles. Test for a specific particle ID should be performed within an appropriate time frame.
Show Mesh checkbox – これをアクティブにするとパーティクルがメッシュの場合メッシュが表示される。
Renderable – when checked, the particles in this group will be rendered. Note, this is not a value that is passed on below the hierarchy.
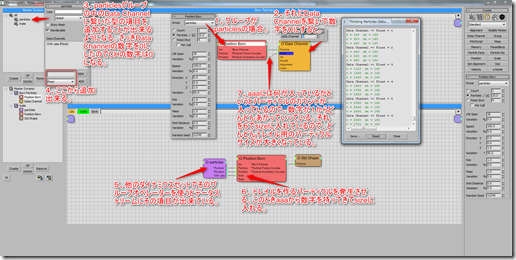
Data Channels – This window contains a list of all extra Data Channels that have been created for use with a particular group. thinkingParticles offers many advanced concepts to control or handle particles. One new concept is the option to attach any kind of data value to a particle through what are called Data Channels. Data Channels are a very flexible way of adding features to a particle that are not known to the system beforehand. To learn more about how Data Channels function, go HERE.
Name space – Just above the Channel Type dropdown list is a blank space. This text field allows you to type in a descriptive name that is to be associated with a newly created Data Channel. While this may seem like a common sense move, please be sure to type in a name in this field BEFORE you hit the ADD button to create the new Data Channel.
Channel Type – This dropdown menu provides you with a list of Data Channel value types that you can use to create new Data Channel output data streams for your Particle Groups.

REM. – Click on the Remove button to remove a selected Data Channel from the list window.
ADD – Click on the Add button to add a new Data Channel to the list window. Be SURE you’ve entered a name in the Name Space prior to clicking ADD so that you new Data Channel has a recognizable name.

Elasticity – 弾力性 100で反発力1。つまり1mの高さからボールを落としたら1m跳ね返る。100以上になるとエネルギーが増すんで注意。
Dynamic Friction – 動摩擦。パーティクル同士が衝突するときの摩擦力This spinner sets the friction (power loss) between particles when they collide with each other. Be aware that this power loss happens only on impact.
Static Friction –静摩擦。 パーティクル同士が接触しているときの摩擦力。これが低いと滑りやすい。
Delay Frames – 遅延フレームThis spinner sets a delay value for the dynamic calculation of a particle. A Delay Frames value of 10 means that 10 frames after the particle is born, the physics engine kicks in and takes control through the dynamic rules that are present.
Optimize – Activate this checkbox to enable the parameters found in the Collision Optimize rollout menu. When active, the face counts within the colliding meshes will be automatically reduced. This face reduction is only done “internally” for the collision objects and not for the rendering mesh. This option may speed up the dynamic simulation enormously. However, if overdone the results may be incorrect.
Active – Select this option to make the particles in the selected group respond to all forces, including dynamic simulations.
Neutron – When this option is active, all particles in this group will be treated as a passive dynamic object. By passive dynamic, we are referring to how the particles will react to other particles and objects within your scene. Collisions between this passive object and other particles will occur, but it will remain uninfluenced by both the particle collisions and forces in your scene.
Particles in this group will also not respond to any force fields or space warps.
Frozen – Activate this radio button to get hybrid particle behavior. In this state, the particles in the selected Group behaves somewhere between the Active and Unyielding states. All particles in this group will be born as dynamically sleeping. In other words, they will not respond to any forces at all except impulses (such as collisions – only forces like Gravity and Wind will have no effect when in sleep mode). In the event of an impulse interacting with the particles in the group, the particles will becomedynamically awake and respond to standard dynamics like other active objects.
Voxel Grid – This spinner defines the number of cubic subdivisions that are calculated to wrap the objects outer boundaries. Higher values will produce more accurate simulation characteristics, however the dynamics calculations will take longer.
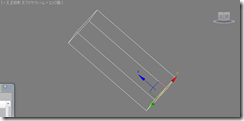
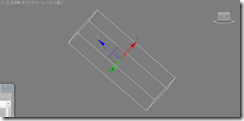
Edges Samples – This spinner is used to add extra collision points along edges of an object. This value should be increased with objects that have long stretched edges (e.g. a long box object) or sliver triangles. If this value is too low, objects may penetrate each other along their edges.
Velocity Friction – This spinner’s value is based on the relative speed difference between two particles. The slower particle will force the faster one to slow down. Higher values will cause the particles to slow down more rapidly. This can be used to simulate viscous materials such as oil, sludge or molasses.
The following parameters are only valid for the first activation of a Frozen object. After the object has changed state the parameters are no longer valid or considered.
Velocity Thresh – sets a Velocity Threshold that should be used to really wake a particle up.
Rotation Thresh – defines the rotational speed that needs to be there to really wake the particle up.
Motion Inheri. – sets the motion inheritance multiplier at wake-up time for a frozen particle
Max Depth – sets the maximum penetration depth allowed, for a deforming particle.
Radius – defines the “compression” radius or area the deformation might occur within a deforming particle.
Impulse Thresh. – sets the minimum impulse needed, to start a deformation of a particle object.
The following parameters are for the NVIDIA PhysX engine valid, only. Other dynamic solvers will not be affected by those settings.
Box – sets the particles to a BOX collision mode. All particles will be treated as highly optimized procedural boxes. This speeds up shape collisions a lot.
Sphere – when checked, the collisions will all be treated as Spherical collisions regardless of the real shapes the particles might have.
Convex Mesh – check this option, to use the Convex hull of the particle shapes to calculate shape collisions.
Triangle Mesh – when checked, the real triangle mesh of the particle object will be used for collision detection between particles.
There is only ONE object allowed in a scene that has this Triangle Mesh flag turned on! PhysX does not support multiple triangle Mesh collisions in a scene.
The controls within this rollout adjust the degree of optimization of objects involved in collision detection.

Off Under Faces – This spinner sets a numerical face threshold for optimization. If an object has fewer faces than the specified value, then it will be ignored for optimization purposes.
Face Thresh – This spinner sets the threshold angle used to determine which faces are collapsed. Low values produce less optimization and better approximations of the original shape. Higher values improve optimization, but are more likely to result in sliver faces that render poorly (see Bias for how to control this).
Edge Thresh – This spinner sets a different threshold angle for open edges (those that bound only one face). A low value preserves open edges. At the same time you can apply a high face threshold to get good optimization.
Bias – This spinner helps eliminate skinny or degenerate triangles that occur during optimization which can cause rendering artifacts. Higher values keeps triangles from becoming degenerate. The default of 0.1 is generally enough to eliminate the skinniest triangles. Range=0.0 to 1.0
A value of 0.0 turns Bias off.
Max Edge Len. – This spinner specifies the maximum length beyond which an edge cannot be stretched when optimized. When Max Edge Len is set to 0.0, it has no effect. Any value greater than 0.0 specifies the maximum length of the edges. When used in concert with the Bias spinner, this control helps you avoid creating long skinny faces while optimizing.
Preserve Smooth Boundaries – When this checkbox is active, the optimization routine only allows faces that share at least one smoothing group to be collapsed.

